DCF Editor
DCF editor - Manual
1. Introduction
The DCF-Editor tool is designed to make working with EDS and DCF files easier. It simplifies tasks like comparing data, spotting mismatches, creating new DCFs, and filtering objects for easier manipulation. This guide will walk you through how to use the tool effectively.
Installation link: Install DCF-Editor
2. Why Use DCF-Editor
When working with large EDS (Electronic Data Sheets) and DCF (Device Configuration Files) files, the following issues arise:
- Information Overload: EDS contains extensive details, while DCF may have fewer.
- Text File Challenges: Text files are hard to compare and merge manually.
- Multiple DCFs: It's difficult to manage several partial DCFs.
The DCF-Editor solves these problems by helping users:
- Spot mismatches between EDS and DCFs.
- Create new DCFs by merging multiple DCFs or copying values from EDS.
- View only relevant objects by filtering unnecessary information.
3. What the DCF-Editor Can Do
- View Objects from the entire EDS or specific parts using filters.
- Compare Data between EDS and up to two DCF files simultaneously.
- Generate a Result DCF with new values either entered manually or copied from existing data.
- Export Results by saving the newly created DCF, filtered to only include relevant objects.
Key Functions:
- Compare DCFs and EDS values.
- Filter objects by name, ID, or any specific criteria.
- Assemble and export a new DCF.
- Change access levels and reorder columns.
4. How to Use DCF-Editor
4.1 Overview
The tool consists of the following five components:
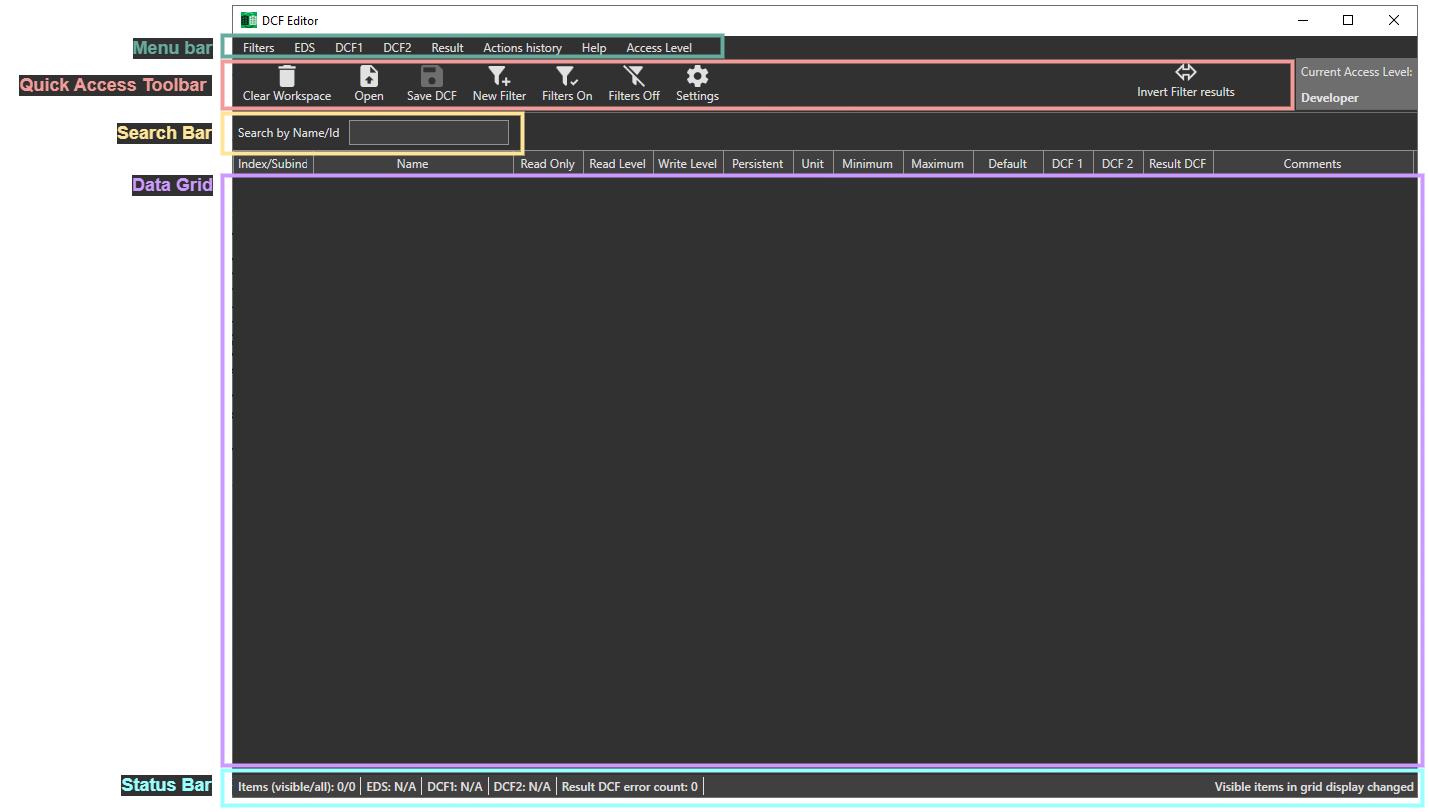 Picture 1: Tool overview
4.2. Opening Files
You can open files using the Menu Bar or simply drag and drop the file from File Explorer into the tool.
4.2.1. Using the Menu bar
- Open EDS: Use the main menu or drag and drop EDS files into the tool.
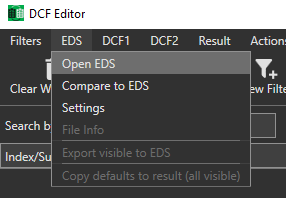 Picture 2: Open EDS
- Open DCFs: You can open up to two DCF files at a time, either from the main menu or by dragging and dropping them.
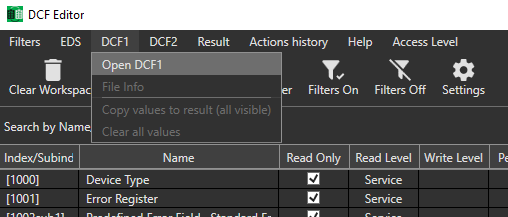 Picture 3: Open DCF 1
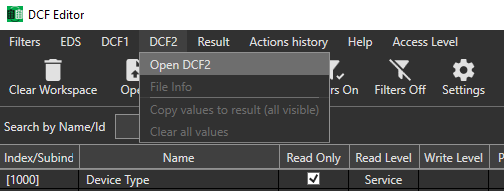 Picture 4: Open DCF 2
4.2.2. Using the Drag and drop version
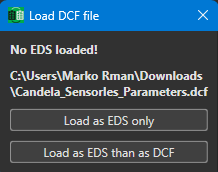
You can drag and drop a .dcf file directly into the tool, which will open a popup window. You can choose whether to load it only as EDS or as both EDS and DCF. This will load the .dcf file into DCF1.
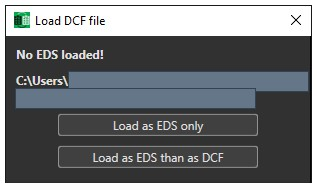
Picture 5: Drag and drop popup window
4.3. Clear Workspace
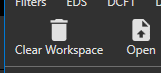
If you want to clear the workspace, simply click on Clear Workspace in the Quick Access Toolbar. A confirmation prompt will appear to double-check if you really want to proceed.
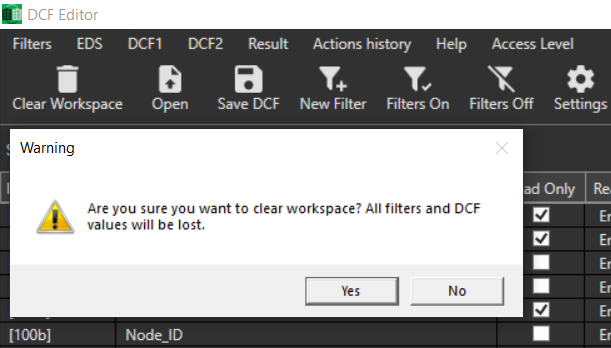 Picture 6: Conformation prompt
4.4. Creating and Applying Filters
4.2.1. Create Filters:
You can create filters to narrow down your view to objects of interest. These filters can be saved for later use.
To create a filter, click Filters on the Menu bar or New Filter on the Quick Access Toolbar. A new window will appear where you can select the property to use for the filter.
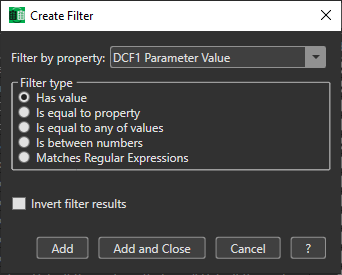
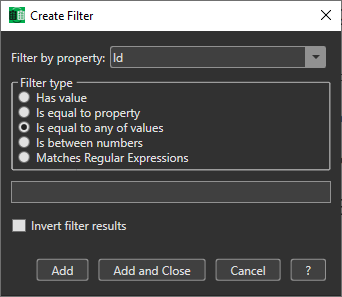 Picture 7: Create Filter
Filter Types:
- Has Value: The selected property has a value.
This is very useful for displaying only objects that have certain settings applied (or not applied), such as showing only objects from DCF1. Note: this serves as a shortcut for the Regex filter using a period (.) and can also be used in Matches Regular Expressions
- Is Equal to Property:
This is used for special checks where it compares two properties, for example: comparing DCF1 and ValueResult to see if they are the same.
ALERT: This is mostly used to compare properties like Min, Max, DEFAULTValue, DCF1, DCF2, and ValueResult. It works with other properties but is not as extensively tested.
Attempting to create filters on other properties may result in failure.
- Show rows where DCFX is equal to DCFX, otherwise not equal.
- Show rows where DCFX is equal to DEFAULT, otherwise not equal.- Default value
- DCF1 parameter value
- DCF2 parameter value
- Result DCF3 value
- Is Equal to Any of These Values: Enter a value to match the property value.
- Is Between Numbers:
This function only works with numbers and checks if they fall within a specified range. Users can omit any part of the range, which effectively makes it a regular greater than or equal to (>=) or less than or equal to (<=) operation.
For example: Setting DCF1 >= 3.2 will match values in DCF1 that are equal to or greater than 3.2.
The function allows for one or two optional numeric operands:
- min <= X <= max (where either min or max can be omitted)
- Matches Regular Expressions:
This section explains the regular expression (regex) text search feature, which enables expanded text searches within the app. The search is case-insensitive, but regex can perform more complex checks, such as matching whole words.
Example Filters:
Regex is a powerful tool, though it can be complex. For guidance and common patterns, consider online resources and tutorials.
Learn more about Regex
Top Commonly Used Regex Patterns
Complete Guide to Regular Expressions (Regex)
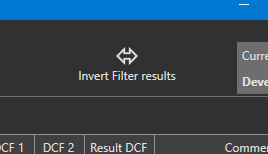
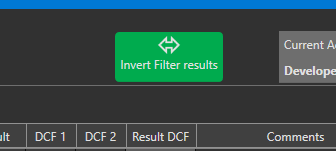
Additionally, there is an option to invert the filter results.
You can also right-click within the column containing the data you want to filter and use the template to quickly create the filter.
 Picture 8: Right click to create filter
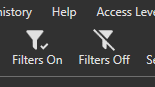
Once the filter is created, it appears next to the Search Bar. If the color is green, that indicates the filter is active. Clicking on the filter's text allows you to easily disable it, causing the green colour to disappear. You can add additional filters, which will be stacked on the same line. Each filter can be enabled or disabled as you please. There is also an edit and a delete button for each filter. Additionally if you have multiple filters you can enable them all with the button Filters On or disable them with the button Filters Off (Quick Access Toolbar).
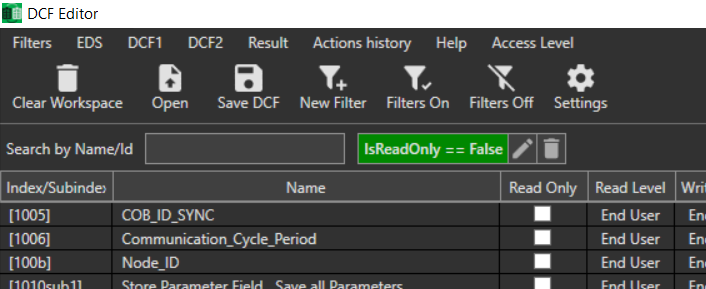 Picture 9: Filter created and active
With using the filter functionality you can easily filter objects by name, differences between DCFs, access level, and more.
4.2.2. Saving Created Filters
When you have configured your desired filters you can save them to a file for future use. Click on Filters and Save to file.
Once you need the predefined filter you can easily import them with the Open button.
Only active filters will be saved!
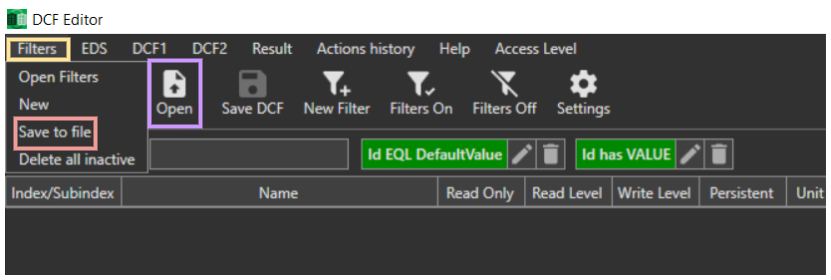 Picture 10: Save active filters
4.2.3. Comparing Values
When one or more DCF files are loaded, you can check whether the value of an object differs from the default value in the EDS. Any changes are highlighted in red in the DCF column.
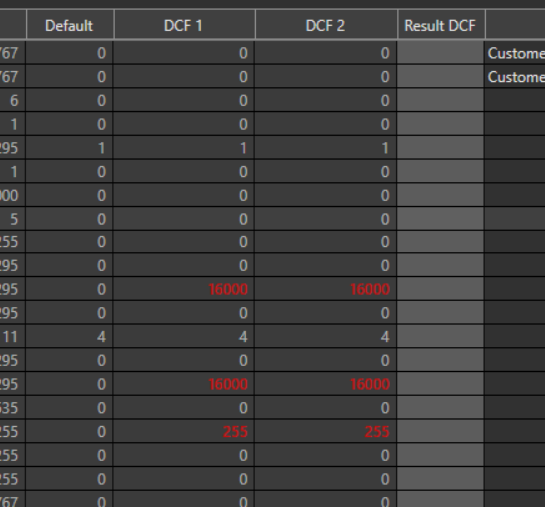 Picture 11: DCF1 and DC2 object value differs from EDS default
4.2.4. Setting Result Values
You can create a new DCF using the loaded DCF files as templates. This is reflected in the Result DCF column. There are multiple ways to do this:
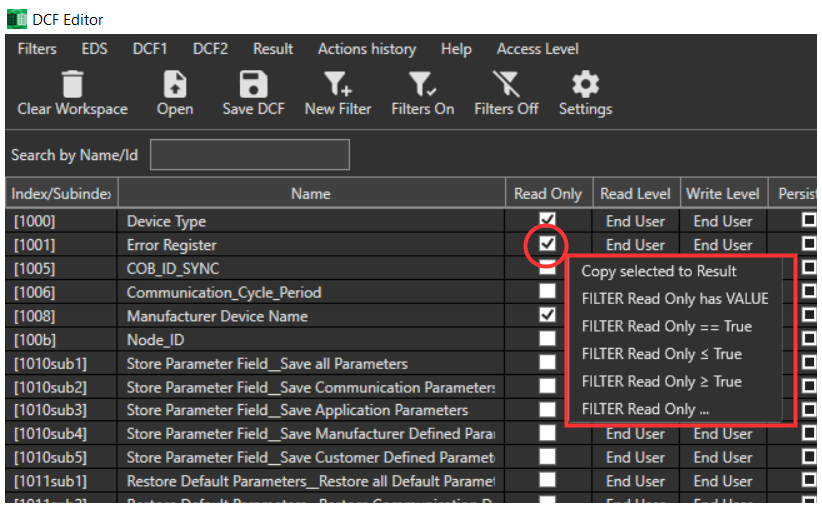
- Directly type in the Result DCF column.
- Right-click on a value in either DCF1 or DCF2 and select 'Copy selected to result.'
- Double-click on a value in either DCF1 or DCF2.
- Select from Min, Max, Default, DCF1, or DCF2.
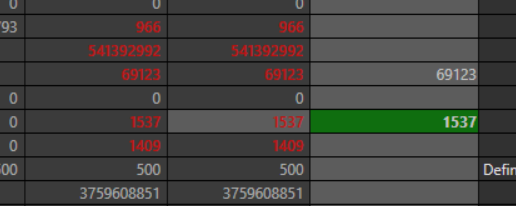
The selected value becomes visible in the Result column and is highlighted in green, as shown in the image below.
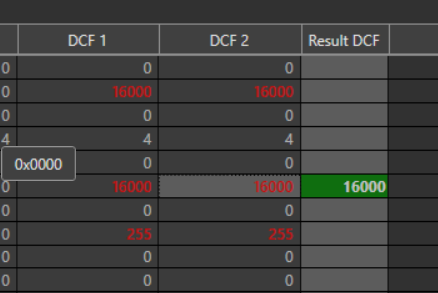 Picture 12: The value in the Result DCF column is highlighted in green
4.2.5. Exporting Results
- Save New DCF: Once you have completed your comparisons and changes, save the new DCF. Only visible objects will be included in the export.
5. Advanced Features
- Column Manipulation: Change the order of columns by clicking and dragging. You can also hide columns going under Settings (see Chapter: Additional Information and Help).
- Sorting: Sort data by clicking on column headers (alphabetical, numerical, etc.).
6. Colour Indicators
Current Colour Indicators
- Red Text: Indicates a mismatch between a DCF value and the default value.
- Green Background: Highlights user-modified values, helping to track changes.
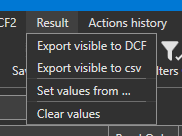
You can also clear the green highlights in the Result DCF after confirming the values are correct and want to focus only on new changes. To do this, click on "Action History" and select "Reset All."
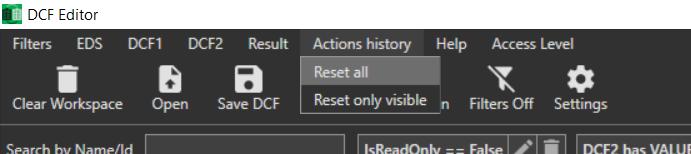 Picture 13: Clearing the green colour indicator.
Example:
- Before resetting:
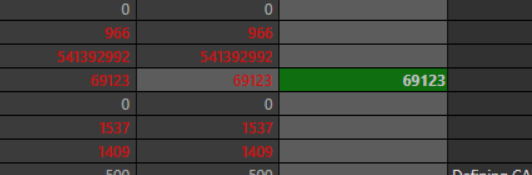 Picture 14: Before resetting
- After resetting:
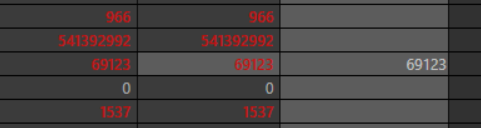 Picture 15: After resetting
- You can then copy new values to the Result DCF, and only those will be highlighted in green:
 Picture 16: Copying new values, which are highlighted
7. Selecting Cells and Copying Values
To select and copy values:
- Single Cell: Click to select one cell.
- Multiple Cells: Hold CTRL and click to select or deselect cells.
- Range Selection: Click, hold, and drag to select a range of cells.
- Copying Values: Once selected, right-click to copy values from Min, Max, Default, DCF1, or DCF2.
8. Set Objects by Access level
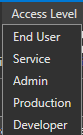
There are two ways to display objects based on the Access level:
- Select "Access Level" in the menu bar and choose the appropriate level.

- Create a ReadLevel or WriteLevel filter (see Chapter: 4.4. Creating and Applying Filters).
9. Additional Information and Help
- Tool Installation: Install the tool from the following link: Install DCF-Editor
- Help Menu: Access tutorials, the user manual (including this one), and troubleshooting guides from the tool's Help menu.
- Debug Logs: If you encounter any issues, you can send debug logs from the tool’s folder by accessing the Help > Open App Folder option.
- Settings: In the settings pop-up window, you can edit column visibility, enable autosave for active filters, adjust column visibility settings, and enable Developer settings.
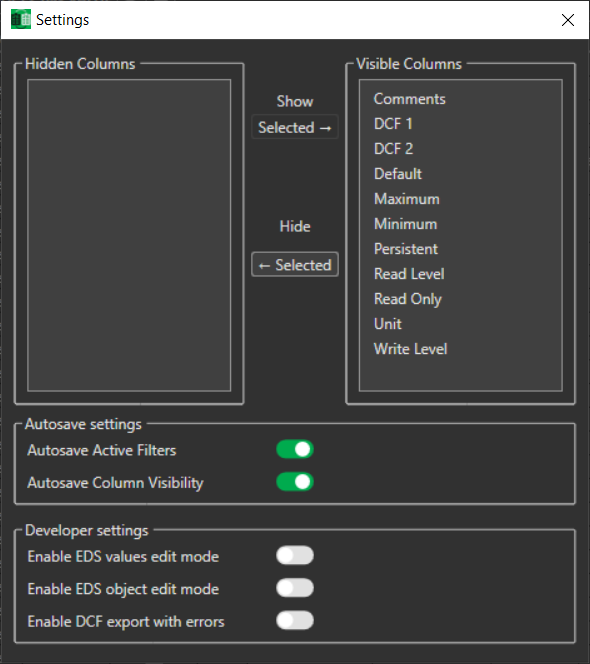 Picture 18: Settings pop up window
10. Filter Examples
10.1. Has value
This filter allows you to match all properties that have any value assigned.
Example of a filter:
DCF1 IS SETDefaultValue IS SET
 Picture 19: Filter "Has value"
Note:
This filter may not work for all properties.
To check if a property has no value, use the Invert Filter checkbox.
Tip:
If you need to search for a specific value, use the REGEX Filter instead.
Technical Note:
This is a shortcut for a REGEX filter.
The equivalent filter is: DCF1 REGEX .
10.2. Is Equal to Property
This filter matches all cases where a property has the same value as another property.
Example of a filter:
 Picture 20: DCF1 Parameter value == DCF2 Parameter value
Note:
The user interface may have fewer options for the second property, so sometimes you'll need to reverse the order. For example, use ValueMinimum == DefaultValue instead of DefaultValue == ValueMinimum.
This filter may not work for all properties or combinations (e.g., Id == DCF2).
Tip:
- To see if a property has any value, use the IS SET filter (or REGEX).
- To check if values differ, use the Invert Filter checkbox.
- To filter for a specific value, use the IS filter.
10.3. Is Equal to any of values
This filter checks if a property has any of the values provided, with values separated by commas.
Example of filter:
DCF1 == 128
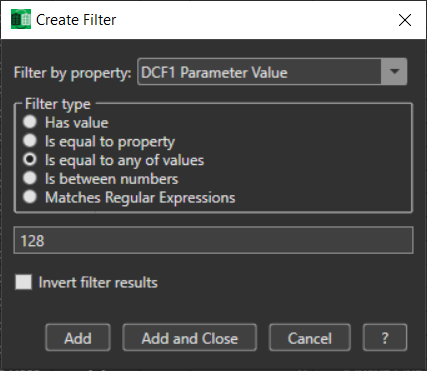
Picture 21: DCF1 Parameter vaule == 128
ReadLevel == 2,4
This will show all objects whereReadLevelis 2 or 4.DefaultValue == 0,100,1000
This will display objects whereDefaultValueis 0, 100, or 1000.DCF1 == error,Error
This will show objects whereDCF1is either "error" or "Error".
Note:
To check if a property has any value, use the REGEX filter instead.
For numbers and larger ranges, use the BETWEEN filter.
For advanced text searches, Regex is a better option.
10.4. Is Between numbers
This filter type allows you to filter numeric values within a range.
Example of filter:
ReadLevel <= 4ReadLevel >= 22 <= ReadLevel <= 4
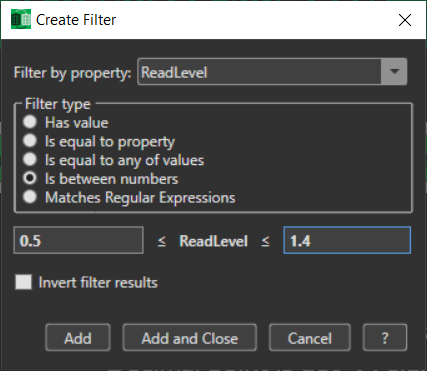 Picture 22: Filter is between numbers
The format follows:
min ≤ X ≤ max
Where "min" and "max" define the range, and X is the value being checked.
Filter Type: "Is BETWEEN numbers"
Operator: ≤ (less than or equal to)
Details:
- The filter can have one or two optional numeric operands. Either the "min" or "max" value can be empty.
- This filter is for numeric values only. Decimal numbers use a dot (
.) as the separator (e.g.,0.5 ≤ DCF1 ≤ 1.4). - Hexadecimal numbers are indicated with
0x(e.g.,0x100A ≤ Id ≤ 0x1A00).
Important Note:
This filter may work on other values but not always as expected. For example, it could match both True and False for the property IsReadOnly.
10.5. Matches Regular Expressions
This filter checks whether a property's value matches a case-insensitive regular expression (regex).
Example 1:
DCF1 REGEX .
This will show all objects whereDCF1has any value.
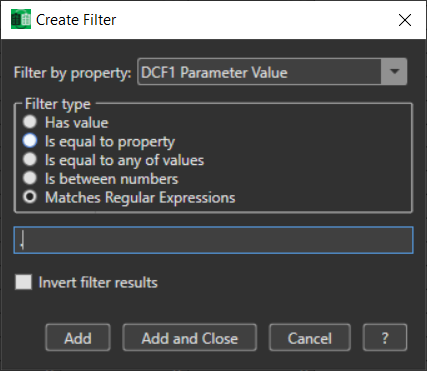 Picture 23: Regex Example 1
Example 2:
DCF1 REGEX error
This will show all objects where the case-insensitive word "error" appears anywhere in the value.
Matches: “noError”, “erroR”, etc.
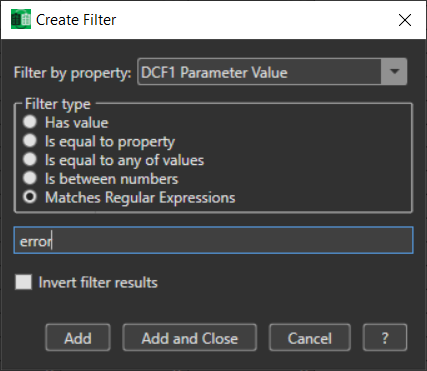 Picture 24: Regex Example 2
Note:
Regex is a powerful tool but can be difficult to master.
There are many ready-to-use regex examples available online (see Chapter: 4.4. Creating and Applying Filters).
11. Common Errors
When loading files, users may encounter validation errors that need to be addressed before proceeding. Below is an example of a typical error dialog and its explanation:
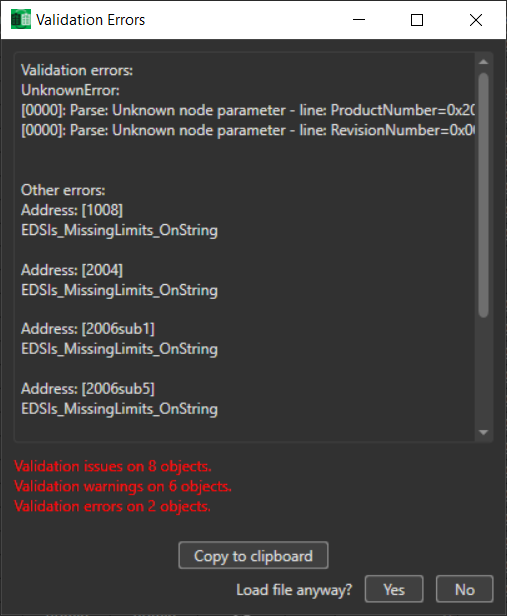 Picture 25: Validation Error Example
Error Details:
- Validation issues on 8 objects: There are 8 objects with general issues identified during validation.
- Validation warnings on 6 objects: These are potential issues that may not prevent loading but could cause problems.
- Validation errors on 2 objects: Critical errors found on 2 objects must be resolved to proceed.
Actions:
- Copy to Clipboard: Users can copy the error list to the clipboard to save or share it.
- Load file anyway?:
- Yes: Allows you to load the file despite the errors, but be aware that the mentioned objects will not be loaded
- No: Cancels the loading process, allowing you to fix the issues before attempting again.
12. Tool Updates and Future Improvements
- Automatic Updates: The tool will automatically update with new features and bug fixes based on user feedback.
- Future Enhancements: Planned improvements include better integration with other tools and the ability to add persistent column data.
Revision Notes V1.13.0 - 04.09.2024
New Access Levels Support
This version introduces support for new access levels, compatible with emDRIVE inverter firmware V1.15.x and above. (Access Levels)
Enhanced Access Level Display
Access levels are now displayed with user-friendly names, replacing the previous numerical format for easier understanding.

Revision Notes V1.12.1 - 28.05.2024
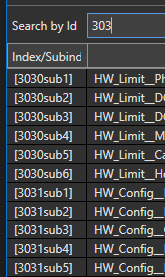
Search by Index Improvement
The search functionality now supports entering only the start of an index. All indexes that begin with the entered value will be displayed.
Invert Filters button
Separate All Filter ON/OFF Buttons
Clear Workspace Feature
EDS Edit mode
The EDS Edit mode, which can be enabled via settings, is now split into two modes:
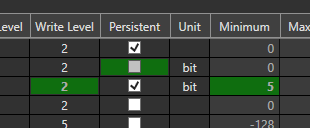
- EDS Values Edit Mode: Allows editing of "Minimum", "Maximum", and "Default" values in the EDS file.
- EDS Object Edit Mode: Enables editing of attributes such as "Read Only", "Read Level", "Write Level", "Persistent", "Unit", and "Comment" in the EDS file.

EDS Edit history
When changes are made to EDS values, the modified values are highlighted in green to indicate that an update has occurred.
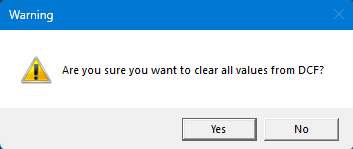
Confirm Clear Result Values
When selecting "Result" -> "Clear values", an additional confirmation window will appear before clearing all values.
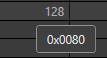
HEX Value Representation
HEX columns for values have been removed. Instead, hovering over a value will display a tooltip showing the HEX representation of the value.
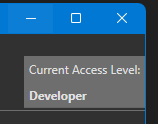
Access Level Update
The current access level has been moved to the right side of the toolbar. The Access Level menu is now used solely for changing the current level.
Result Value Validation
Values entered in the "Result DCF" columns are now validated against the object's type, minimum, and maximum values. Invalid entries are highlighted in red.
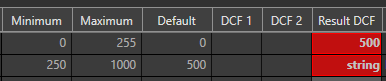
Hovering over an erroneous cell will display a tooltip describing the issue.
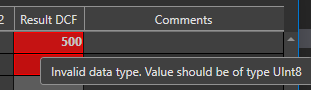
The status bar at the bottom of the screen will also indicate if errors are present.

Saving results to DCF will be disabled if errors exist.
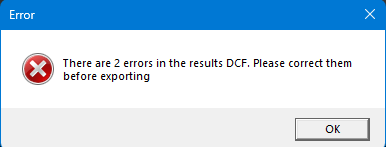
However, in developer mode, you can enable saving with errors by selecting the "Enable DCF export with errors" option in settings.

Loading DCF Without EDS
If a DCF is loaded before an EDS file, a new dialog will appear, allowing you to choose whether to load the DCF as an "EDS-only" file (without values) or as both "EDS" and "DCF" with values in DCF1.